Search This Blog

Labels

restore (15) welding (4) dollies (1) electrical (1)
Showing posts with label camper. Show all posts

Monday, October 7, 2013

Body Work - Part 1

Repairing the body panels is the first step to body work. Used the compressor and air gun to clean all the excess media from media blast. Girnded off all the left over body filler to expose metal. I will shape the metal with shrink disc and hammer and dolly to get a smooth level surface. Also replace panels that are not workable.


I have used the hammer and dolly on this section with some quick results. Tomorrow I will use the shrinking disc.


I need to prep the metal with wax and grease cleaner before welding to get a good connection.

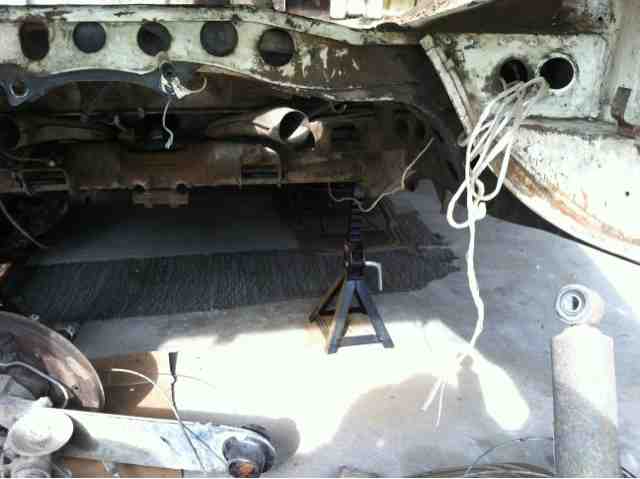
The head lamp buckets can not be saved. I need to get new buckets to replace these crusty buckets.


Head lamp buckets are tacked in with about 5 welds on tabs located on the front panel. I drilled the welds out but it was tricky not to completely damage the tabs. I will reinforce the tabs before putting in new buckets.


I received new headlamp buckets from cip1 and they are a very close fit and match to the old buckets. Minus the holes drilled in the back of the buckets (for 67+ bug) all the tabs and mounts fit perfect.

http://www.cip1.ca/ProductDetails.asp?ProductCode=C21%2D0182


Links and Stuff
http://krayden.com/tds/henk_metalprep_79_tds.pdf
http://lib.store.yahoo.net/lib/stylespilotshop/metalprep-79-quart-msds.pdf

Evercoat gold body filler
Metal shaping tools
Mig gas


Thursday, May 9, 2013

Front End Rebuild

Rebuilding the vw bus front end doen not seem like to difficult a proposition. Parts seem plentiful and relatively cheap. My question is can it be improved and how easily. I plan to find out. Stay tuned.

Im looking for a front beam kit. Something to replace all those worn out bushings, bearings, tie rods, etc. But first a power wash is badly needed.


I would like to upgrade the front end to a more modern system. Items below are available but I have not yet done the research to know how well they work.

Camper suspension handling kit is something I want. It's supposed to improve handling. Also considering power steering rack. Not sure if there is a unit that exists OOTB.

I have made some progress on the suspension rebuild. I disassembled most of the front beam, including torsion arms, sway bar, shocks, steering arm and tie rods.

There are several parts I will leave in place including the needle bearings and the bushings. These should be replaced if the bearings or the internal beam tube is not well greased. In other words if you see lots of fairly clean grease the bearings are in good condition. Of course clean and replace grease.
Another thing is to check for play. If play exists it may well be easier to replace the beam.

How to determine the bearings and bushings are in good condition? How to determine if there is to much play? I will cover this in my next Front End post.

The torsion arm ball joints will be replaced and need to be pressed out with a special tool. Also the tie rod ends will be replaced as well as the steering pin that holds the steering nuckle to the beam. Also wheel bearing will be replaced.

I am having difficulty finding replacements for the torsion arm seals.

Thursday, May 2, 2013

The Mystery of Electrical Work

I remove the wiring harness from the bus. I learned a cool trick form the Bug Me videos. You can simply tape rope or twine to the harness and other wires like the dome light wires then start pulling the wires through with the rope trailing. Make sure to leave the rope in so you can get the harness and wires back in position.


Sunday, April 14, 2013

Hand break pivot pin

Only one more part to remove before sending the body to the media blaster. So far things have gone fairly smooth. I've of course ruined some minor parts while disassembling the bus. This can't be helped when you are a novice at restoring.
Any way the hand break seems to be the last part standing. This is because of the pivot pin. Which has come to my attention as "the dreaded hand brake pivot pin".

This thread says it all, I love thesamba.com it has everything. http://www.thesamba.com/vw/forum/viewtopic.php?p=6611843#6611843


I did end up cutting the pivot pin as recommended by samba forum. I used a grinder and almost cut my arm off as for the tight angle I had to work under. So I will have to drill the pin  out of the hand break arm, and get a new pin. Looks like they can be had as mentioned in the forum or they are pretty easy for a shop to fabricate.

Monday, November 5, 2012

Stripping Stuff

Restoring 73 Riviera Camper. I thought I would document it.


I have stripped the interior and removed the engine, transmission, most of the electrical, doors and windows. Getting ready to send to the media blaster. I'm trying to get as much paint off as possible to save a few bucks.


Lots of old foam insulation that I had to tear out. 4" Window Scraper was very useful. Get lots of extra razors.


Stripping paint with JASCO. It is nasty stuff. Make sure to have lots of ventilation in the work area. Take frequent brakes away from the work area. Use skin and eye protection. Do small sections in a sitting. JASCO main ingredient is Methylene Chloride. Goolge it before you use it!
That said it works great for removing paint. Along with a Window Scraper Razor it makes for short work of paint.

Corner Panel after applying Jasco.

Same corner panels after Jasco and window scraper.


Basic safety equipment. Do not use respirator while applying Jasco. Do use respirator while scraping. The respirator does not protect against gases such as carbon monoxide and methylene chloride both off gas of Jasco. Tends to give false sense of security.


Tools for stripping paint. Including Jasco, window scraper, extra razors. 


One tool not shown here is a medium paint brush. Use a cheap paint brush to glob Jasco on in copious quantities. Lay it on thick. The goof off is for removing glue and trim adhesive.